Building a network of Synthetic Test Engines
This section includes the following topics:
Installing a Synthetic Test Engine
You will install a Test Engine on one or more hosts that are as geographically dispersed as the user base. In
Figure: Monitoring the enterprise’s devices and applications with Synthetic Testing test engines in the Northwest and Southeast monitor the performance of applications that are served from the Northeast. Test results are collected at a South Central location.
Installing the Test Engine on a Linux or Windows Host
1. Find the test engine installer on NetIM.
For Linux: <InstallDir>/external/TestEngine/TestEngine-linux.zip
For Windows: <InstallDir>\external\TestEngine\TestEngine-windows.zip
2. Copy the.zip file to the Test Engine host(s).
On Linux: Move it to a directory of choice, such as /opt
On Windows: Move it to the top level of the C: or D: drive.
The drive you choose is referred to as <ParentDir> in the remaining steps.
3. Make sure you are operating as a the root or administrator user:
4. Move to the directory with the zip file, and unzip.
On Linux: cd /opt
./unzip TestEngine-linux.zip
On Windows: Use Windows Explorer to navigate to TestEngine-windows.zip, and unzip.
This process creates <ParentDir>\Riverbed\TE\3.0.0, such as:
On Linux: /opt/Riverbed/TE/3.0.0
On Windows: C:\Riverbed\TE\3.0.0
5. Move to the Riverbed directory. (Do not unzip any file in this directory.)
6. On the command line, run the test engine installer.
On Linux: ./install.sh
On Windows: install.bat
If an older test engine is found, the new test engine adopts the old engine’s settings. In that case, go to
Step 16.
7. Enter the full-qualified domain name of NetIM [localhost]:
Example: NetIMHost-1.ourCompany.com
8. Enter the port number of your NetIM machine [3162]
If you specified a different TCP port through which NetIM communicates with test engines during installation, enter that value here.
9. Enter location of the keystore for HTTP Testing [<InstallDir>\TestEngine]
If you specified a non-default location for your keystore during installation, enter that path here.
10. Enter new keystore password for HTTP Testing [changeit]
If you expect to perform a Synthetic “HTTP Test” that uses the keystore, enter a stronger password. The default password is changeit.
11. Verify that Firefox is located at <location>. Enter its absolute path.
The path to Firefox is likely to be C:\Program Files (x86)\Mozilla Firefox\firefox.exe (or usr/bin/firefox)
12. If Chrome is installed, enter the absolute path to chrome.exe. If Chrome is not installed, press Enter.
If you expect to perform Synthetic “HTTP Tests” with the Chrome browser, enter its path, such as C:\Program Files (x86)\Google\Chrome\Application\chrome.exe
13. Enter an identifying name for this Test Engine [defaultName]
The default is the name of the local host. Ideally, use a descriptive name such as the geographic location of the Test Engine, such as NorthEngine.
14. (On Linux Only)
Please enter the user name to which the ownership of the Test Engine files will be set: myUserName
This user will be the owner of the NetIM Test Engine installation directory. This user must also be a member of the given group. Do not use ‘root’.
15. (On Linux Only)
Please enter the group name to which the ownership of the Test Engine files will be set: myGroupName
Use any group of which the given user is a member.
16. Press any key to continue. The command prompt reappears. Installation is complete.
17. Verify that the test engine is running:
On Linux: ./TE.sh /svc_cmd status TE
On Windows: TE.bat /svc_cmd status TE
Verifying that NetIM recognizes all test engines
To verify that NetIM recognizes all installed test engines by their assigned names, perform the following procedure.
Verifying that NetIM recognizes all test engines
1. Log in to NetIM.
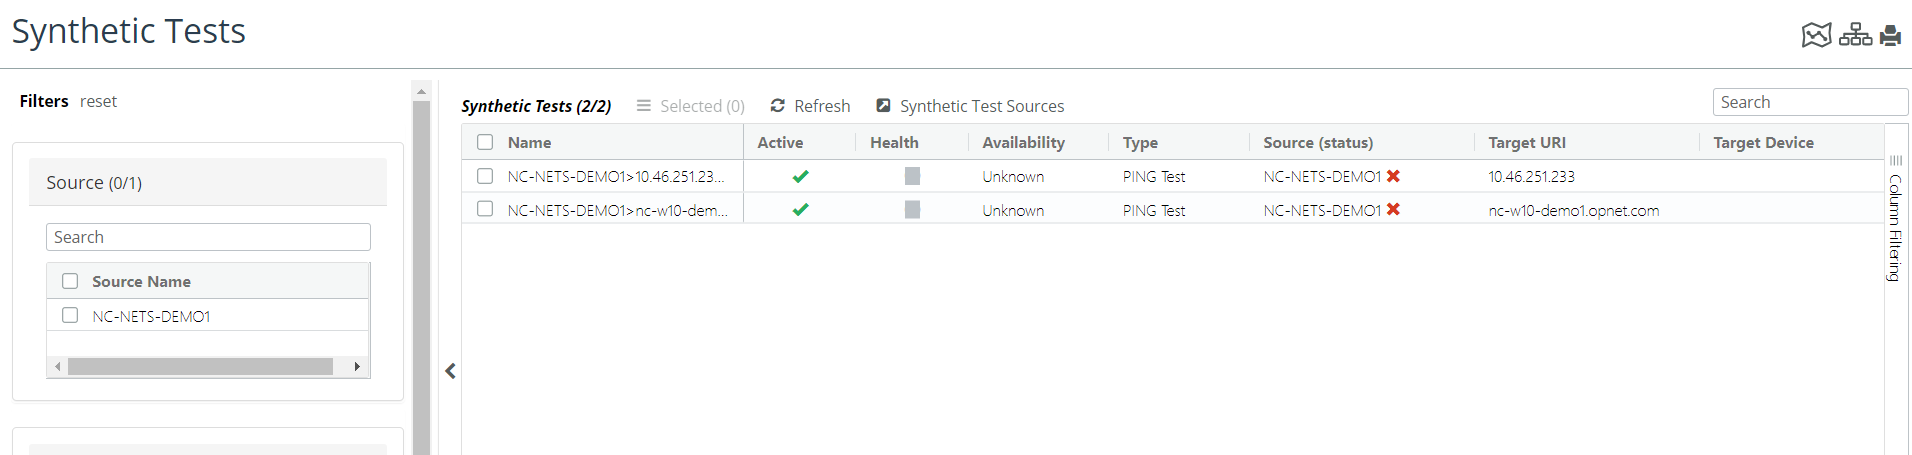
2. Choose More > Synthetic Tests. The Synthetic Tests page appears, as shown in the following screen.
Synthetic Tests page
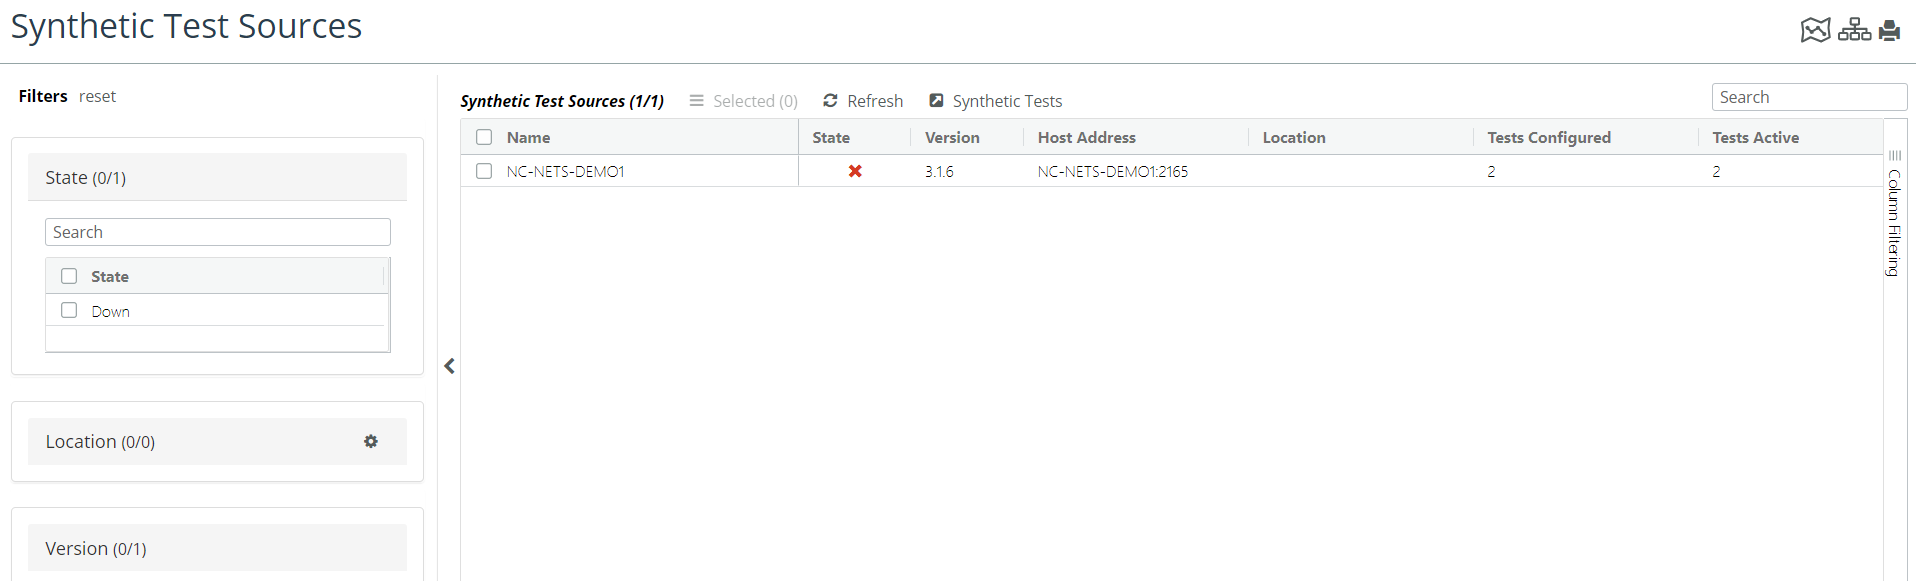
3. Click Synthetic Test Sources at the top of the page. A list of the installed test engines and their status appears, as shown in the following screen.
Synthetic Test Sources
4. If necessary, try the following initial troubleshooting steps:
– If a specific engine does not appear in the list, or is listed as Not Connected, wait one minute and look again.
– If any engine still fails to appear in the list, verify that the engine is running on its host.
On the host, choose Start > Administrative Tools > Services (or run services.msc).
Look for the service Riverbed NetIM Test Engine. If the service is not Started, right-click the service name, click
Start, and go to
Step 3.
Verifying that NetIM is listening for test engines
Verifying the Engine-to-NetIM communication path
NetIM and its Test Engines communicate by HTTP.
1. Open a browser on the Test Engine’s host.
2. Navigate to NetIM’s web service at http://<ip_address>:<port_number>/st, such as http://10.46.250.107:3162/st or http://NetIMHost-1:3162/st
Server is listening for TestEngine connections.
Mon Apr 20 11:57:09 EDT 2015
If you do not see such a message, contact technical support at: https://support.riverbed.com.