Working with Custom Views
NetIM supports the custom configuration of panels or Custom Views.
Custom Views can be edited and created and saved as a template, and Custom Templates can be applied from a menu of saved templates in the following places:
• The Home page
• Object pages on the At a Glance tab
The Custom Views feature provides you with control over a key part of NetIM’s visualization. With NetIM’s Custom Views feature, you can do the following:
• Redefine default dashboards.
• Add specialized dashboards.
• Control what is present in a dashboard.
• Control what dashboard displays for what element.
Custom Views also introduces the concepts of Custom View Templates and Template Rules.
A Custom View Template defines the visual content and layout for the page. The data shown in the view is defined by the object or element on which the template is being applied.
A Custom View Template Rule associates a template with one or more elements. The template rules are used to automatically pick the template you want displayed when the At a Glance dashboard is selected for the element.
This section consists of the following topics:
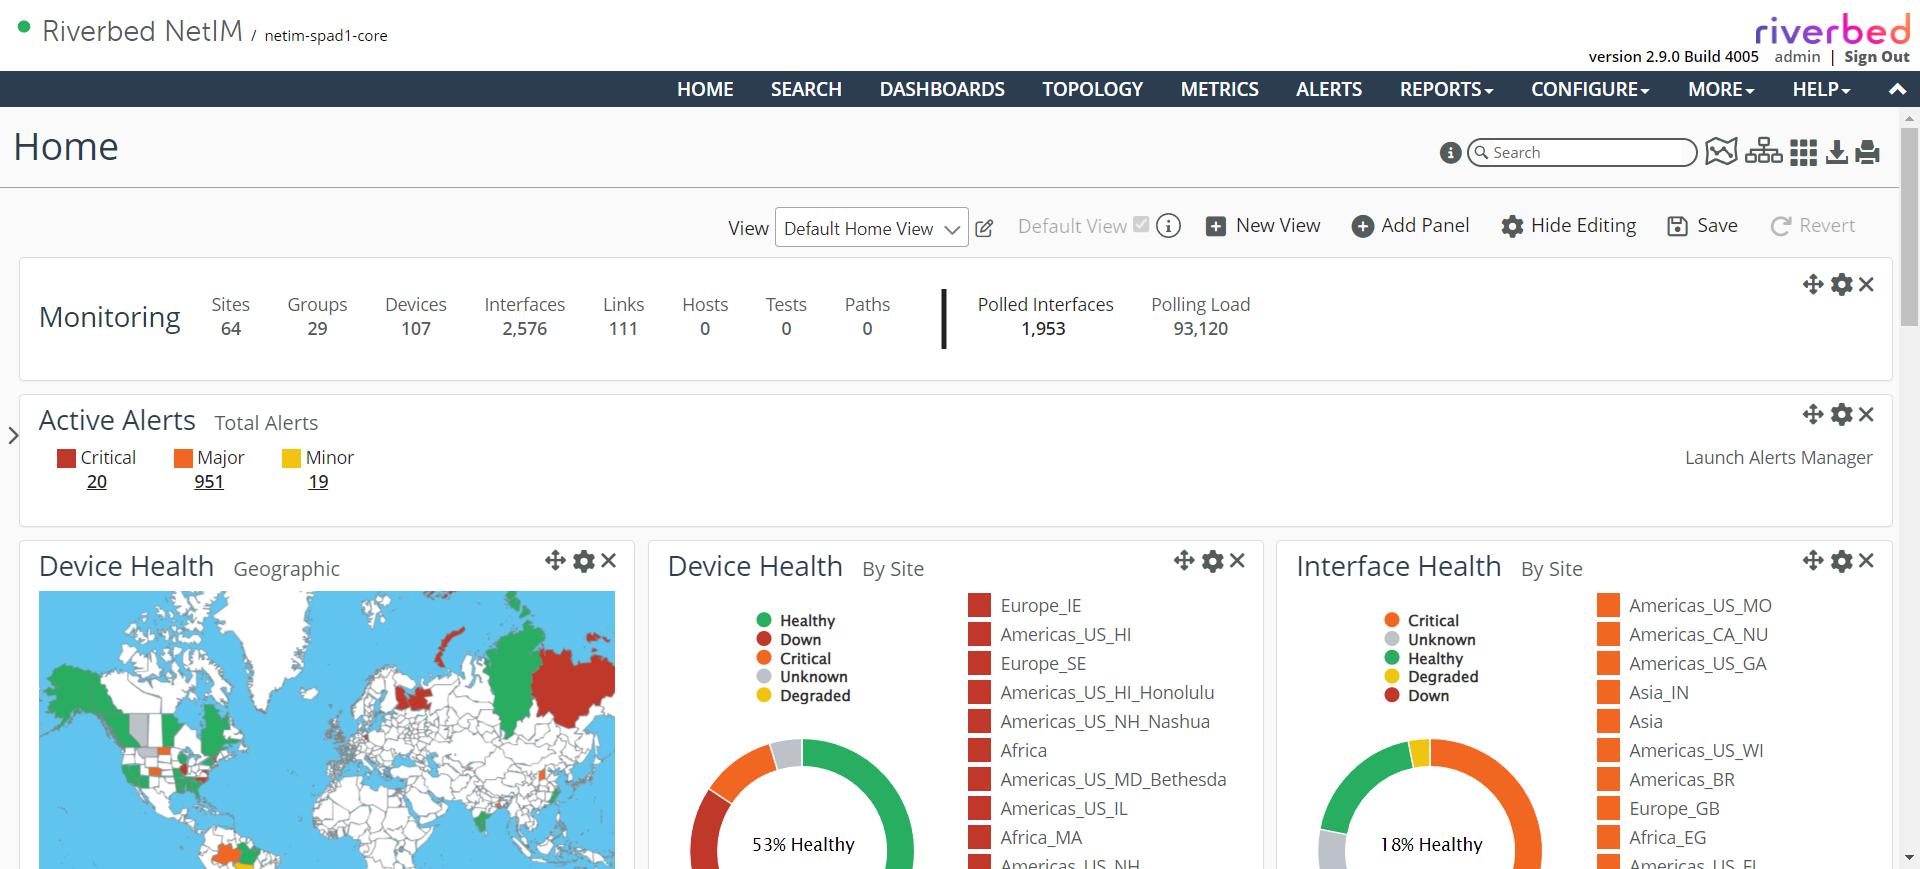
This section uses the Home page as an example, although the procedures are the same for all Object view pages on their At a Glance tab.
Editing panels
To edit panels on the Home or Object pages
1. Log in to the UI as admin.
2. On the Home page or Object page of interest, click the Edit Custom View icon in the upper right.
3. Click the Show Custom View Editing icon.
The move, edit, and delete icons appear in the upper-right corner of each object view, as follows. The icon allows you to move the panel using a visual drag-and-drop paradigm. The icon provides a menu that allows you to edit, clone or delete the panel. The X icon deletes the panel.
Move, edit, and delete icons
4. Click the editing icon for the object you want to edit.
5. To edit the panel, click Edit Panel.
The Edit Panel screen provides different options depending on the panel.
6. From the Edit Panel screen you can do the following:
– Change the title, sub-title, and size of the object
– Change the panel content settings
Custom Views have added several visualization options including Geographic Heat Map by Interface Health, a Top-N/Bottom-N chart, a Navigator tree pane, support for gauges, line charts, and components. The Geographic Health panel can be added to any dashboard.
Not all metrics are supported at this time.
The Top-N/Bottom-N Chart lists the top-N or bottom-N elements. The chart provides the latest value and a spark-line showing recent history to the top-n or bottom-n elements. You can find this visualization component used in NetIM to provide metrics associated with a device’s interfaces.
The Navigator Tree panel is a hierarchical, tree-based viewer that is sorted by the worst health. You can add this new visualization panel to any dashboard:
– Interface health - Yes (default) or no. If yes, used to calculate the overall health of the object.
– Polled Object filter - Include all objects (default) or include only polled objects.
– Group filter - Allows you to control the elements displayed.
7. When you are satisfied with your edits, click Submit, and the updated panel is saved to the currently applied template.
System-defined templates cannot be overwritten, so if your template name is the same as a system template, you will be prompted to provide a new name, and that new template will be saved to the Custom Views page.
8. After saving the new template you can decide if you want it to be the new default template by selecting the Default Template check box.
Adding panels and applying templates
To add panels and apply templates
1. On the Home page or Object page of interest, click the Edit Custom View icon in the upper right.
2. Click the Show Custom View Editing icon.
The Add Panel icon appears in the menu options at the top of the page.
3. To add a panel to the Home page or Object page of interest, click the Add Panel icon.
4. Select the new panel type from the categories under Summary, Maps, Data, and Banners.
5. To save your choice, click Add.
An Edit Panel for the Monitored Network dialog box appears, appropriate for the panel you have chosen to add.
6. Use the Edit Panel dialog box to define the new panel.
7. When you are satisfied with your edits, click Submit, and the new panel is saved to the currently applied template.
System-defined templates cannot be overwritten, so if your template name is the same as a system template, you will be prompted to provide a new name, and that new template will be saved to the Custom Views page.
8. After saving the new template you can decide if you want it to be the new default template by selecting the Default Template check box.
You can also select a template to apply to the Home page or the At a Glance tab on any Object page, from the Custom View Template drop-down menu.
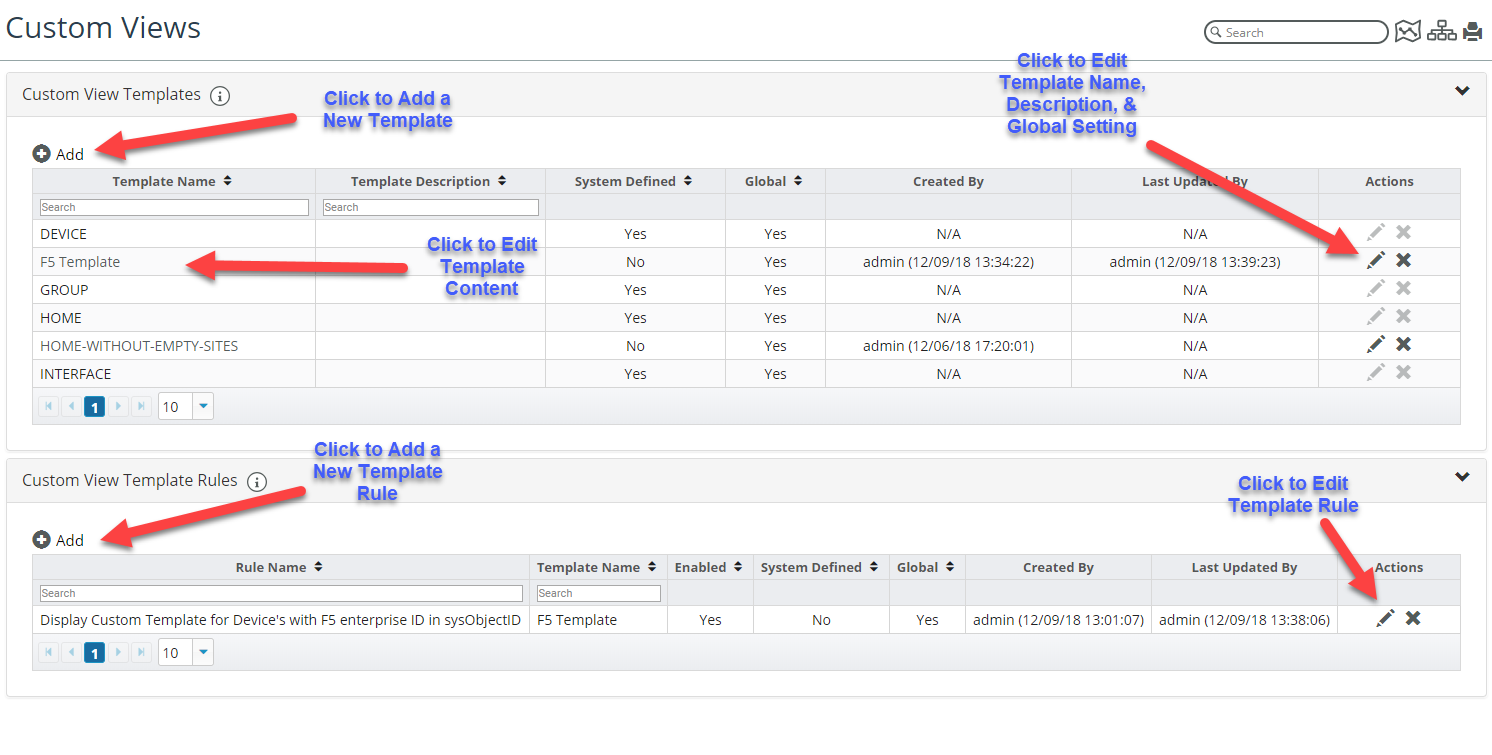
All your templates are available by choosing Configure > All Settings > Organize > Custom Views.
The Custom Views page allows you to add (+Add icon), delete (X icon), and modify (pencil icon) Custom View Templates and Custom View Template Rules, as shown in the following screen.
Custom Views page
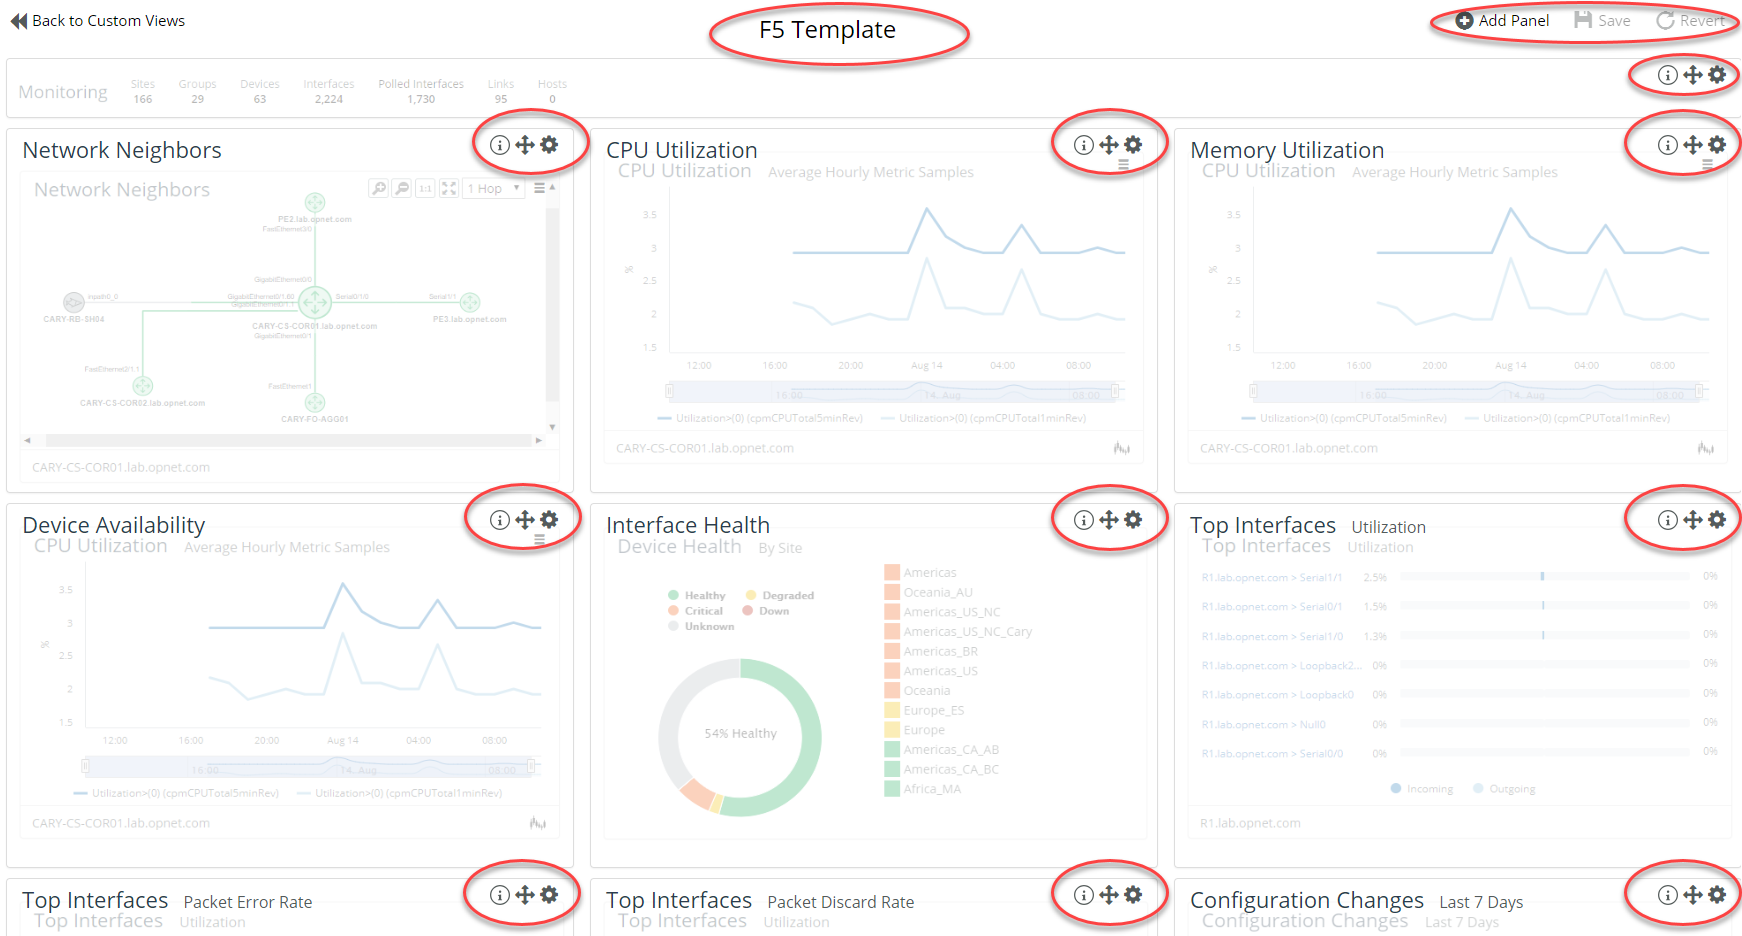
Editing an existing populated template from the Custom Views page is very similar to enabling custom view editing from a populated dashboard.
Editing an existing populated template from the Custom Views page
For more information about the Custom Views page, see
Working with the Custom Views page.